

Small Wooden Crate Decorating Ideas
How to Make an Easy Wooden Crate Shelf
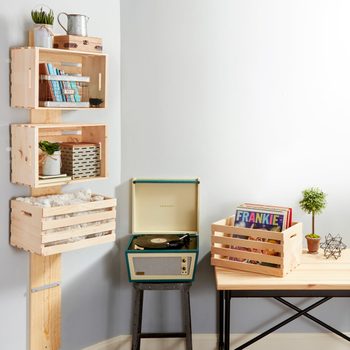
Hang up your crates, take them down — this convenient rack can handle a lot of stuff!
 Family Handyman
Wooden crates are a staple at flea markets and antiques stores, but now you can also buy them at home centers.
You might also like: TBD
- Time
- Complexity
- Cost
- An hour or less
- Beginner
- $20-50
Wooden Crate Shelf 1-Hour Project
The wooden crates shown here cost about $10 each, and are sturdy enough to hold books and record albums. We wanted a quick and convenient way to hang the wooden crates, and easily take them down if needed, so we devised this simple hanging rack.
The rack is just a 1×8 board with hangers every 16 in. We assembled the hangers from machine screws, nuts and aluminum bar stock. The most difficult part of the project is cutting the aluminum and drilling the holes. And even this is simple enough for a beginning DIYer. Check out these other wooden crate projects!
To browse a variety of crates, check out cratesandpallet.com.
 Family Handyman
Wooden Crate Shelves: Display or Storage for Any Room
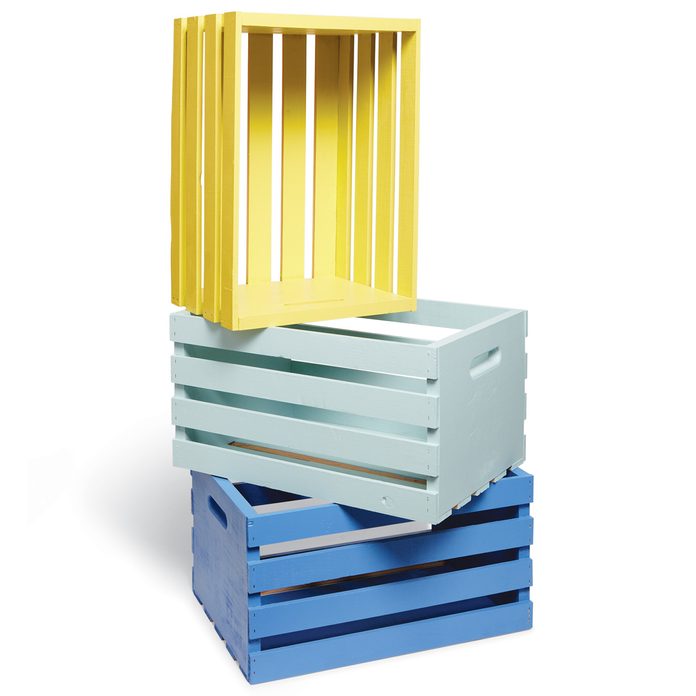
- Crates are available in various shapes and sizes
- Apply a clear finish, stain or paint
- They're easy to hang and take down
Wooden Crate Shelves Project Directions:
This is a simple project that you'll be able to finish in about an hour. Our wooden crate rack can hold four crates, but you can make yours shorter or taller to fit your needs. It's designed to hold crates with 3/8-in.-thick slats. But you can easily modify it to accommodate crates with thicker slats by adding the right combination of nuts and washers to the machine screws. Remember, if you want to hang crates with slats thicker than 3/8 in., you'll need to increase the length of the machine screws accordingly.
 Family Handyman
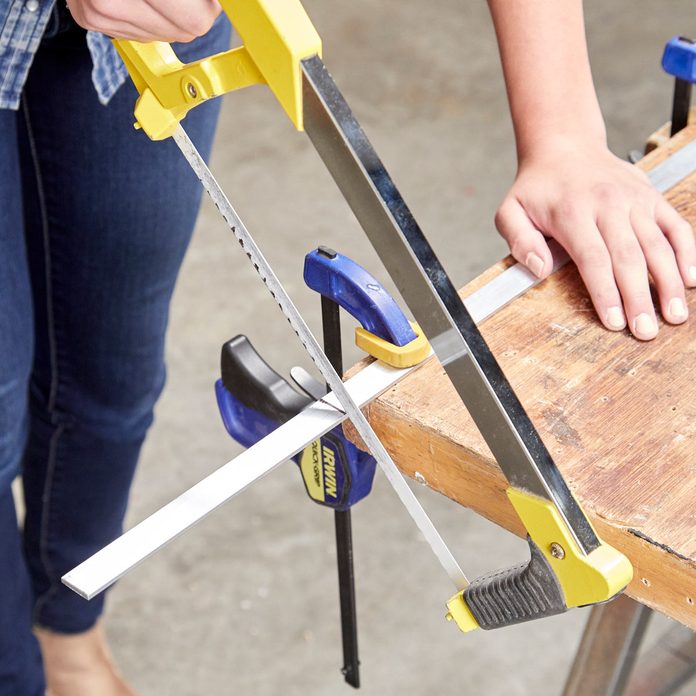
1. Cut the Aluminum
Start by making the aluminum hangers. Use a square and a pencil or fine marker to mark the aluminum bar. Mark the bar at 7-1/4 in., clamp it to your workbench and cut it with a hacksaw, or a miter saw and a carbide blade. Dull the razor-sharp ends with 100-grit sandpaper.
 Family Handyman
2. Drill Holes for the Bolts
When you're done cutting and smoothing the aluminum, mark the aluminum using Figure B, in project PDFs below, as a guide. Drill a 1/16-in. hole at each mark. Then enlarge the hole by drilling with a 1/4-in. bit. Clamp the completed aluminum hanger on a blank hanger. Drill 1/4-in. holes using the completed hanger as a guide.
 Family Handyman
3. Mark and Drill the Board
The next step is to drill holes in the 1×8 board to accept the hangers. Choose the best-looking side of the 1×8 board to face out. Then turn the board over and use the dimensions in Figure A, also in project PDFs below, to draw square lines across the back of the 1×8. Mark the hole locations and drill 3/8-in. deep recesses with a spade bit. Then drill out the center with a 1/4-in. bit.
 Family Handyman
4. Mount the Hangers
Slide the machine screws through the holes in the board. If the fit is too tight, enlarge the holes in the 1×8 slightly by wiggling the 1/4-in. bit in the hole while the drill is running. Put a machine screw into each hole and thread two nuts onto each screw. They only need to be finger-tight.
 Family Handyman
5. Tighten the Hanger Nuts
Add washers and thread the nuts onto the machine screws. Tighten the nuts with an adjustable wrench (or a 7/16-in. wrench). Be sure to check the fit by sliding one of the crates onto the hanger. The wooden crate slat should slip easily behind the aluminum bar. If the fit is too tight, remove the hanger and add a washer to the bolt. Mount the hangers, along with additional washers if needed, to complete the project.
 Family Handyman
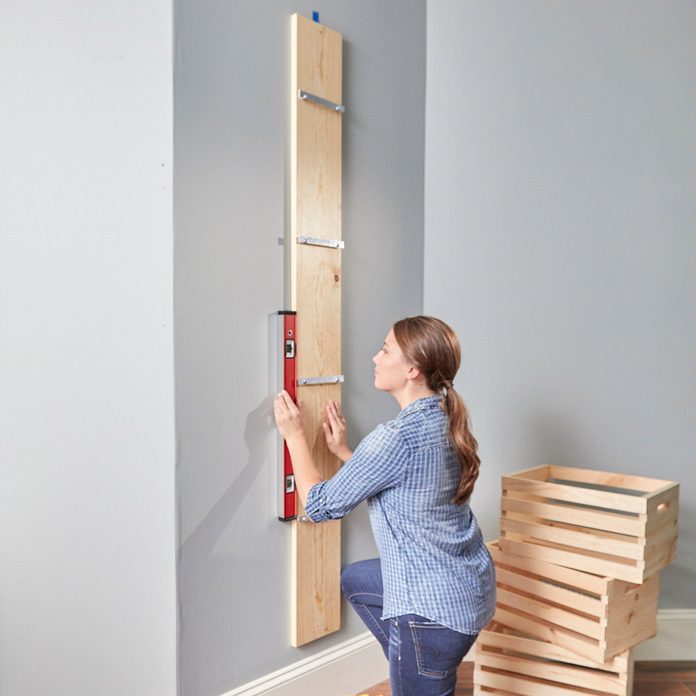
6. Screw the Board to a Stud
Because the wooden crate rack with crates could be quite heavy, we recommend that you mount it to a stud or other solid wood. Locate a stud in the spot where you want to install the rack. Screw the top of the board to the stud. Use a level to plumb the board. Then drive a screw through the bottom.
If there isn't a stud in your ideal location, use two heavy-duty hollow-wall anchors like the Toggler brand Snaptoggle anchors instead.
 Family Handyman
In the mood to make stuff? Check out these 101 Saturday morning projects!
Wooden Crate Shelves Materials List:
Everything you need to build this wooden crate rack is available at home centers.
- 1×8 Pine Board: We used a 6-ft. board, but you can match the length to the number of crates or baskets you want to hang. Choose a straight board that's not twisted or cupped.
- Crates: We purchased crates at a home center. To see a variety of crates and find retailers, visit cratesandpallet.com.
- 1/8-in. x 3/4-in. Aluminum Bar: Allow 8 in. for every crate hanger. This project required a 3-ft. length.
- Nuts and Machine Screws: You'll need two 1/4 x 20 machine screws 1-1/4-in. long and six 1/4-in. nuts for every hanger. That's eight machine screws and 24 nuts for this project.
- Spade Bit: The size isn't critical, but it must be at least 3/4 in.
- Hacksaw: A blade with 32 teeth per inch is ideal. Check the label to find out.
- Hanging Hardware: You'll need two 2-1/2-in. screws or two heavy-duty drywall anchors to hang the crate rack.
Wooden Crate Shelves Project PDFs:
Click the links below to download the materials and cutting lists for this project. As well as the projects construction drawings.
Figure A — Hole Locations for the 1×8 Board
Figure B — Aluminum Hanger Holes
Similar Projects
Small Wooden Crate Decorating Ideas
Source: https://www.familyhandyman.com/project/how-to-make-an-easy-crate-shelf/
Posted by: walkerwhoduch.blogspot.com
0 Response to "Small Wooden Crate Decorating Ideas"
Post a Comment